Home Tags Posts tagged with "variation"
Tag:

variation

sleeveless varisation reina shirt
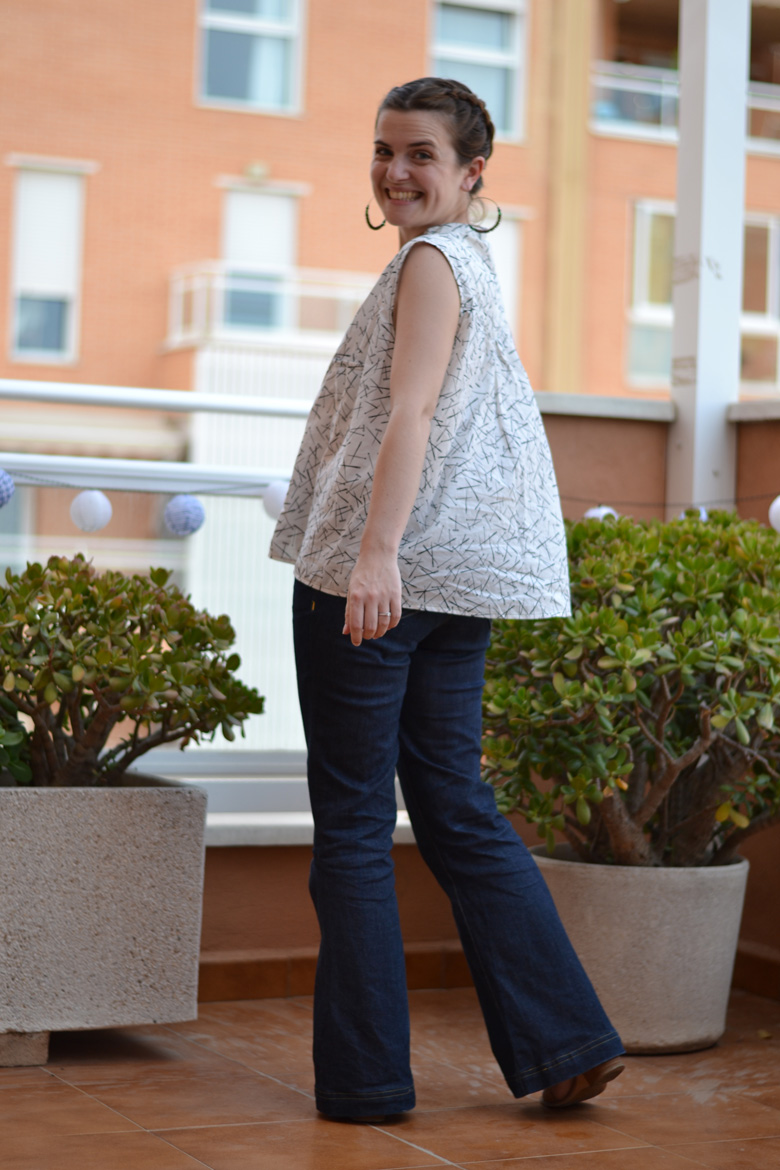
We are having a nice summer in Valencia and temperatures are already quite high (for the last 2 months I’ve been wearing summer dresses and sandals). And for me, the Reina shirt is perfect to wear on such warm days: it’s flowy, loose-fitting but put together as well. I’ve made this sleeveless version two months ago and I’m wearing it constantly. I’ll have to make a new one and maybe a dress variation as welsleeveless varisation reina shirt
sleeveless reina shirt 1sleeveless reina shirt back
I’ve used a cotton voile from Cosercosas, a spanish online shop. It’s very soft and light and I couldn’t resist the cute sewing needles print!
Instead of sewing the sleeves, I just finished the armhole seamallowances with self-fabric bias binding. Easy! I didn’t change anything else (except not using any interfacing to keep the drape and lightness of the fabric).
sleeveless reina shirt side
Hope you like it! What’s your favorite summer garment?
8 comments
1 FacebookTwitterPinterestEmail
When designing the Sorell trousers, I thought they would make a great pair of shorts as well. This is such an easy variation to make: just cut the legs  above the knee ast desired length.


Sorell-trousers-variation-pair-short-sewing-pattern-1I like my shorts short so I cut mine about 8 cm below the crotch seam, including the 4 cm hem. I also added about 2 cm to the side seam at the hem to get them a little bit wider around the thighs.
Sorell-trousers-variation-pair-short-sewing-pattern-2Sorell-trousers-variation-pair-short-sewing-pattern-3I used linen for this version, it wrinkles a lot but is very comfortable to wear when it’s so hot like now. I really like the safari feel they have.
Sorell-trousers-variation-pair-short-sewing-pattern-4Sorell-trousers-variation-pair-short-sewing-pattern-5If you want to see a denim version, head over to Anne‘s blog. Inspired by her version, I didn’t add the back pockets either 😉
signature1_editado-1

8 comments
0 FacebookTwitterPinterestEmail
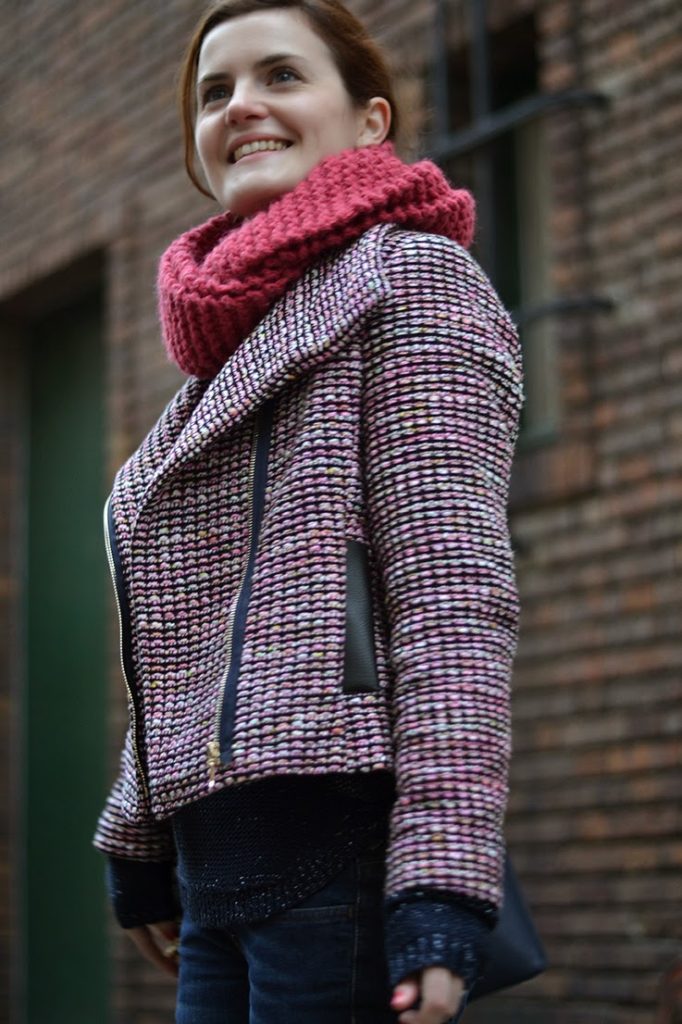
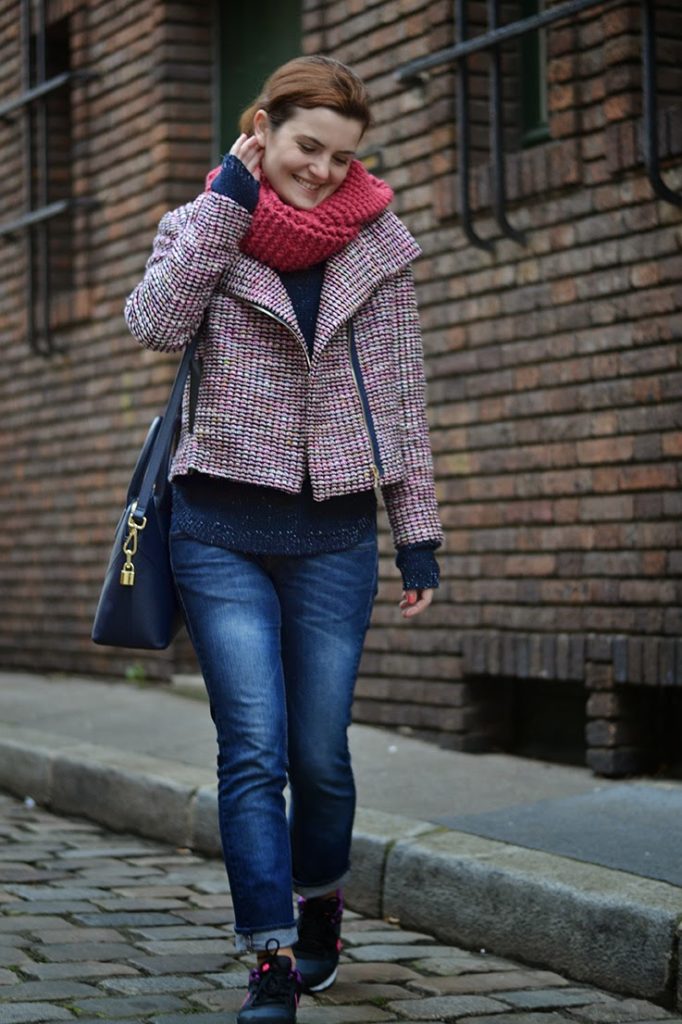
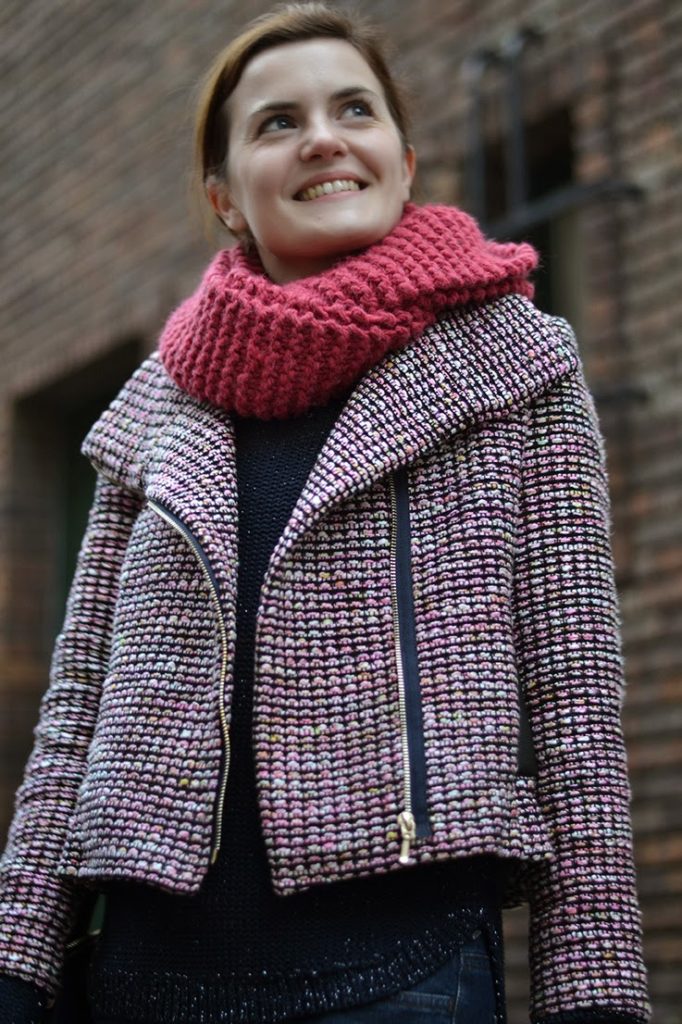
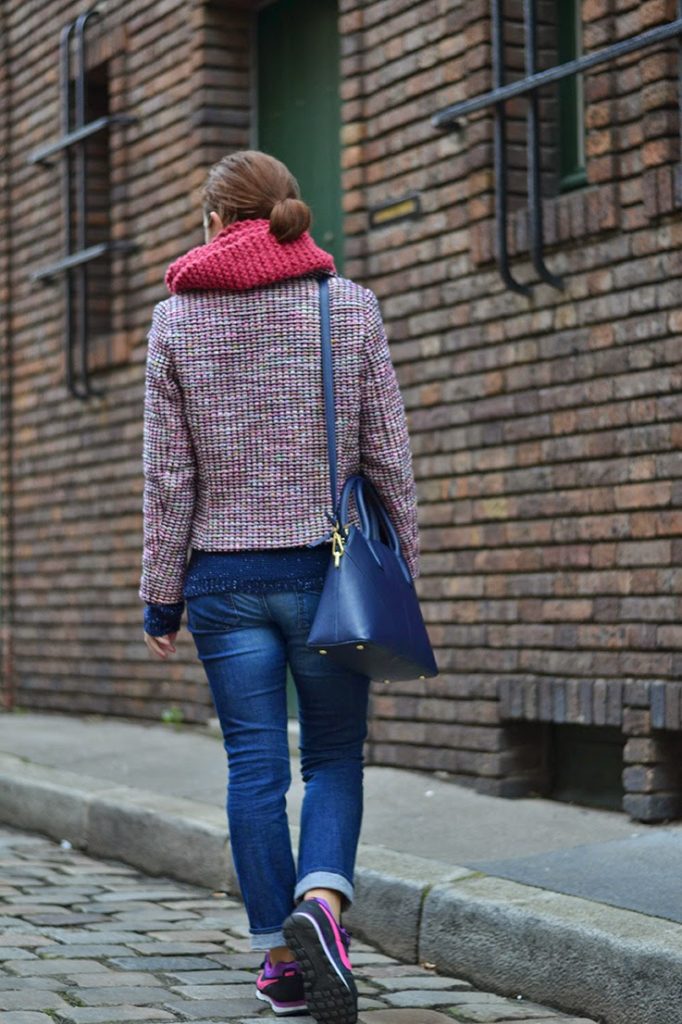
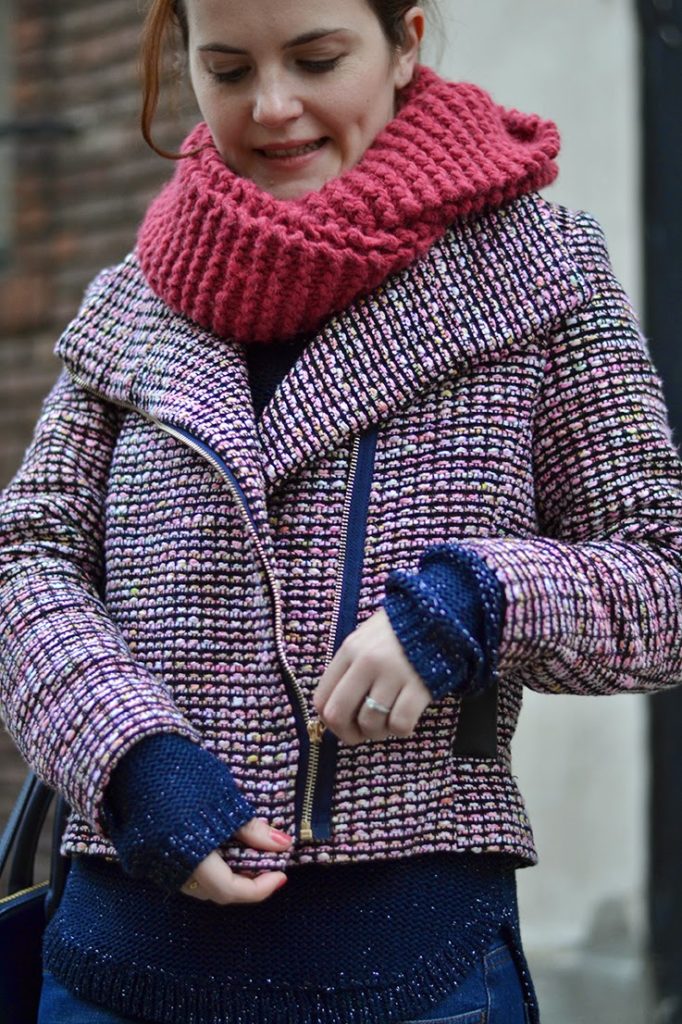
Last week, we were seeing how to make a biker jacket using the Quart coat pattern and I can finally show you the finished jacket.
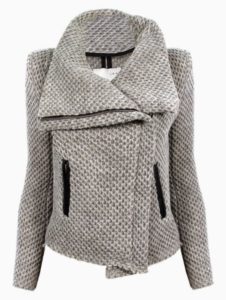
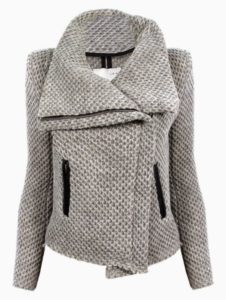
The inspiration for this variation was this Kristen jacket by Iro:
Quart-Coat-pattern-variation-finished-biker-jacket-sewing-1
Kristen jacket by Iro
Instead of the grey jersey fabric, I chose one of my stock I’d been keeping for more than two years. This bouclé tweed is from Linton (official supplier of Chanel) and I was waiting for the perfect idea to use it. I’m glad I kept it as I really like the constrast between the “lady” fabric and the rock’n roll shape of the biker jacket.
Quart-Coat-pattern-variation-finished-biker-jacket-sewing-2Quart-Coat-pattern-variation-finished-biker-jacket-sewing-3Quart-Coat-pattern-variation-finished-biker-jacket-sewing-4
I interfaced all the jacket pieces with a light weft interfacing as the tweed is quite loosely woven. As I explained in the previous post, I just cut the pattern pieces above hip level and used a separable metallic zipper instead of the buttonholes.
You can find the tutorial to make the biker version here: Quart biker jacket tutorial.
Quart-Coat-pattern-variation-finished-biker-jacket-sewing-5Quart-Coat-pattern-variation-finished-biker-jacket-sewing-6
In the end, I’m very happy about the way this jacket turned out. It’s easy to wear, comfortable and the fabric is so pretty. I wore it everyday on my trip to Paris. If you are making this version, don’t hesitate to send me pictures or leave a comment.
Have a great week!

signature1_editado-1

38 comments
4 FacebookTwitterPinterestEmail
Today, I want to show you a new variation for the Quart coat pattern. I don’t know about you, but I like to use the same patterns multiple times. If you want to make a motocycle style jacket like this Iro number, here is the tutorial.
quart-coat-pattern-variation-transform-into-zipped-biker-jacket-1
What I’ve been dreaming of: Kristen jacket by Iro.

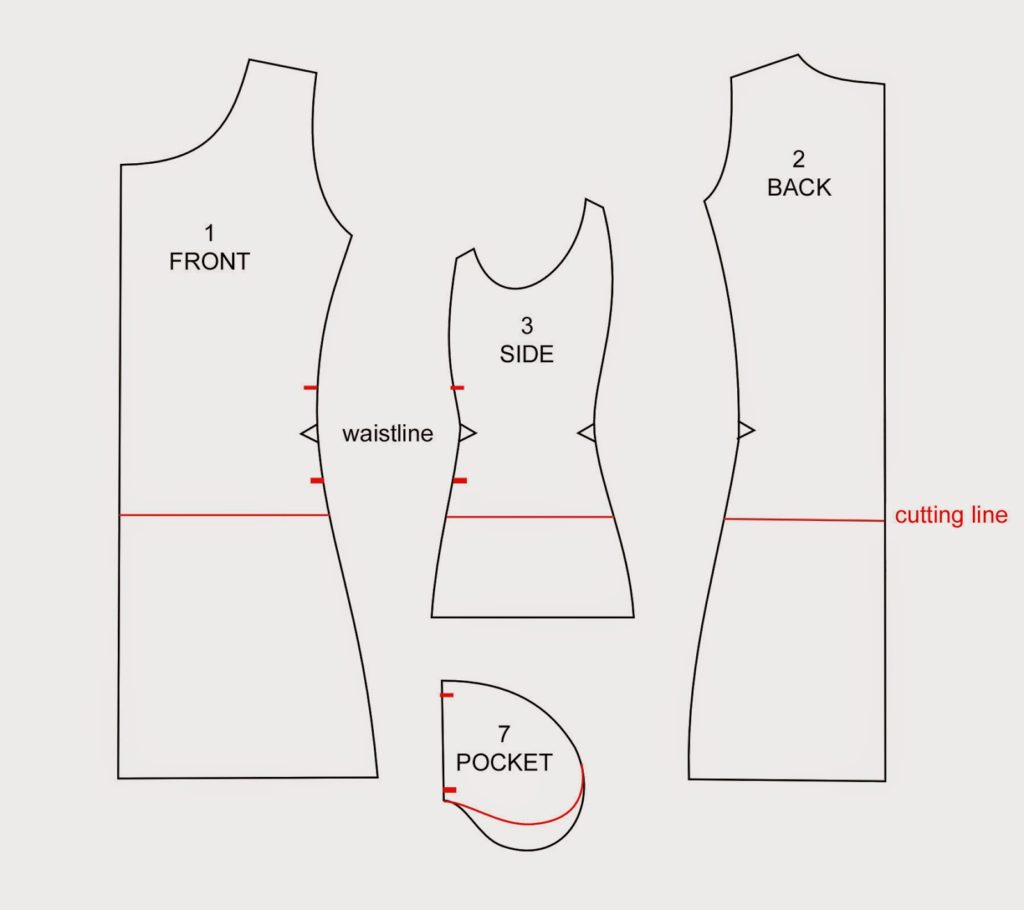
You’ll need a 50 cm (20″) separable metallic zipper, a ruler, a pencil and your Quart pattern pieces.Take your main pattern pieces: front, back and side. You’ll need to decide the length of the jacket, for mine I drew the cutting line about 10 cm (4″) below the waistline mark, seam allowances included. Do the same for the lining and the front facing. Draw new pocket marks, approx. centered around the waistline.
quart-coat-pattern-variation-transform-into-zipped-biker-jacket-2
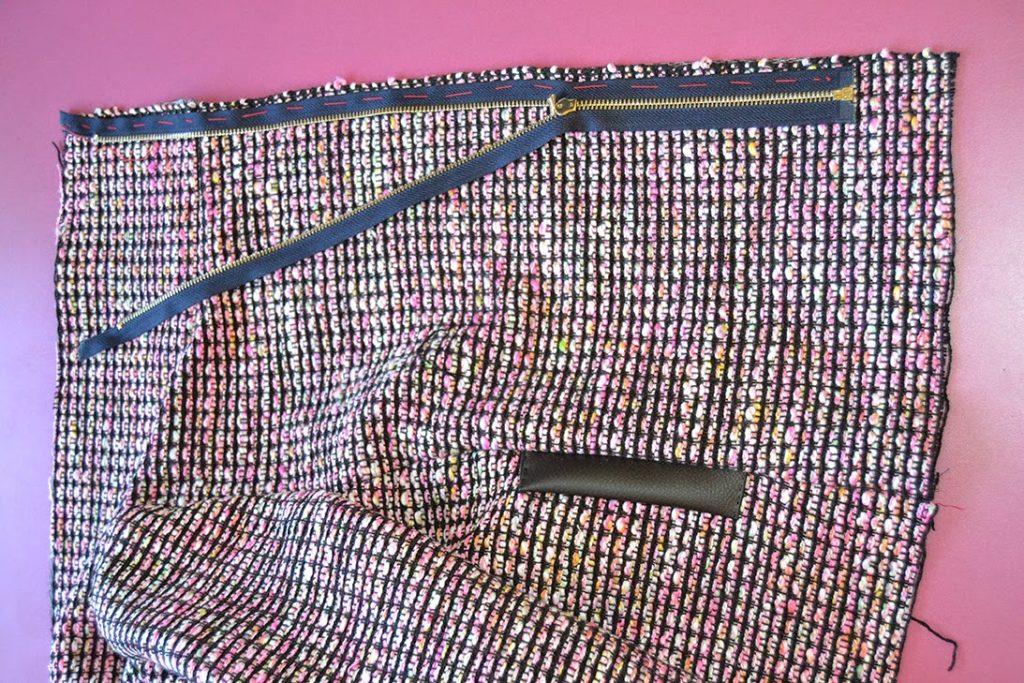
Stitch the collar to the jacket and baste one side of the zipper to the front piece and collar, with the teeth at 1,7 cm (3/4″) from the edge. Follow the instructions and at step 37, sticth the whole facing to the jacket with right sides together, enclosing the zipper in the seam.
quart-coat-pattern-variation-transform-into-zipped-biker-jacket-3

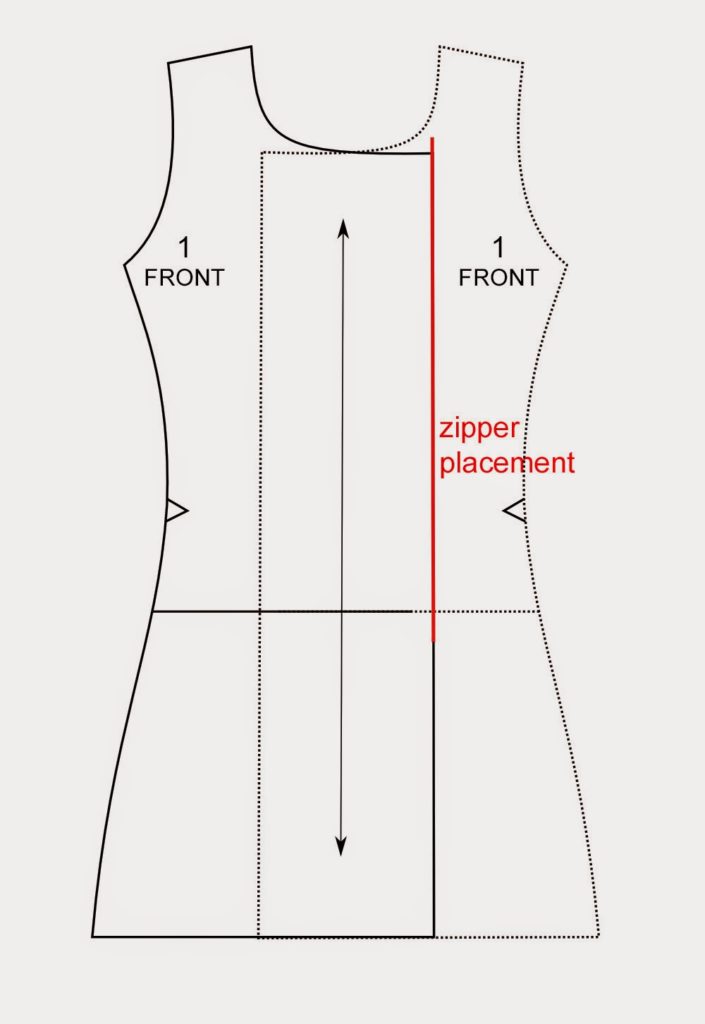
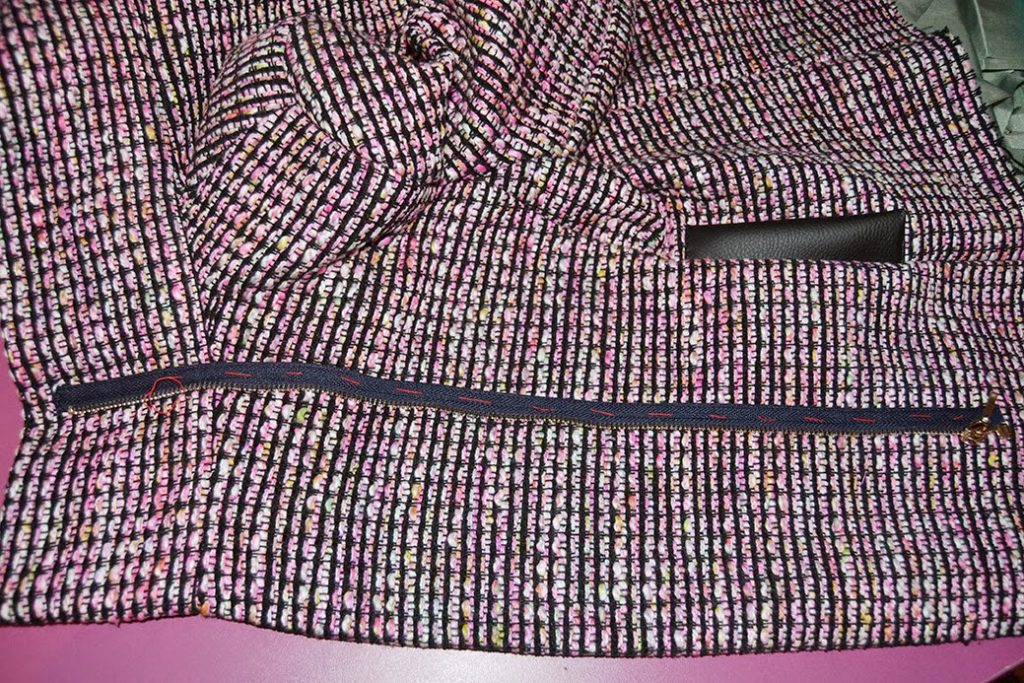
The other ziper side is simply stitch directly on the front piece and collar. In order to know where to place it, overlap the front pieces matching the grainline and mark where the zipper should meet (in red in the illustration). Baste the zipper to the front and collar and stitch with a zipper foot.
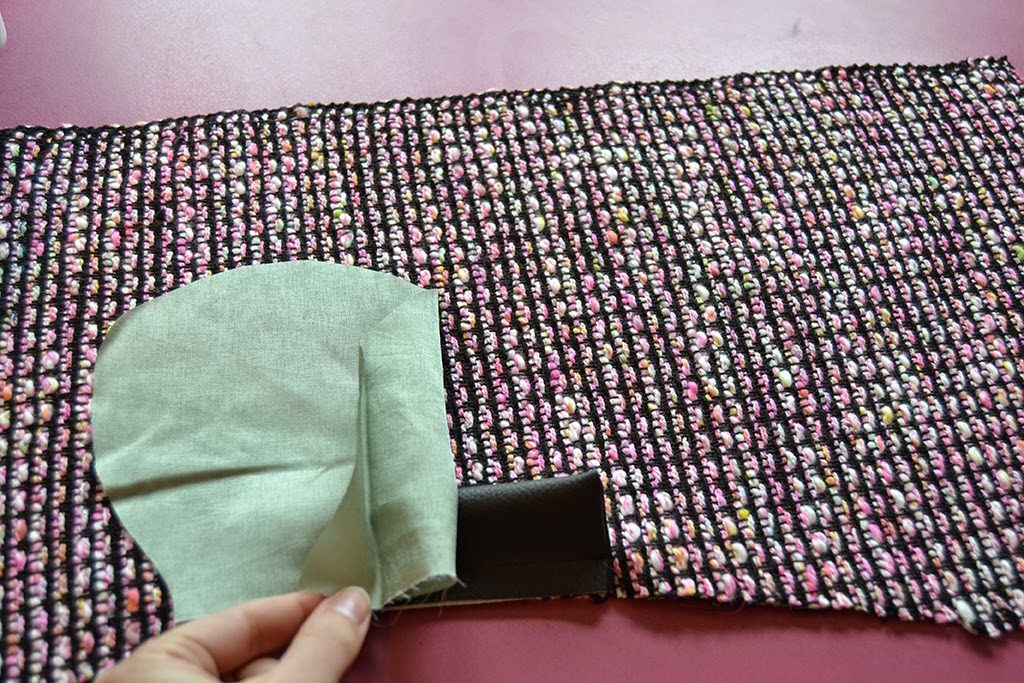
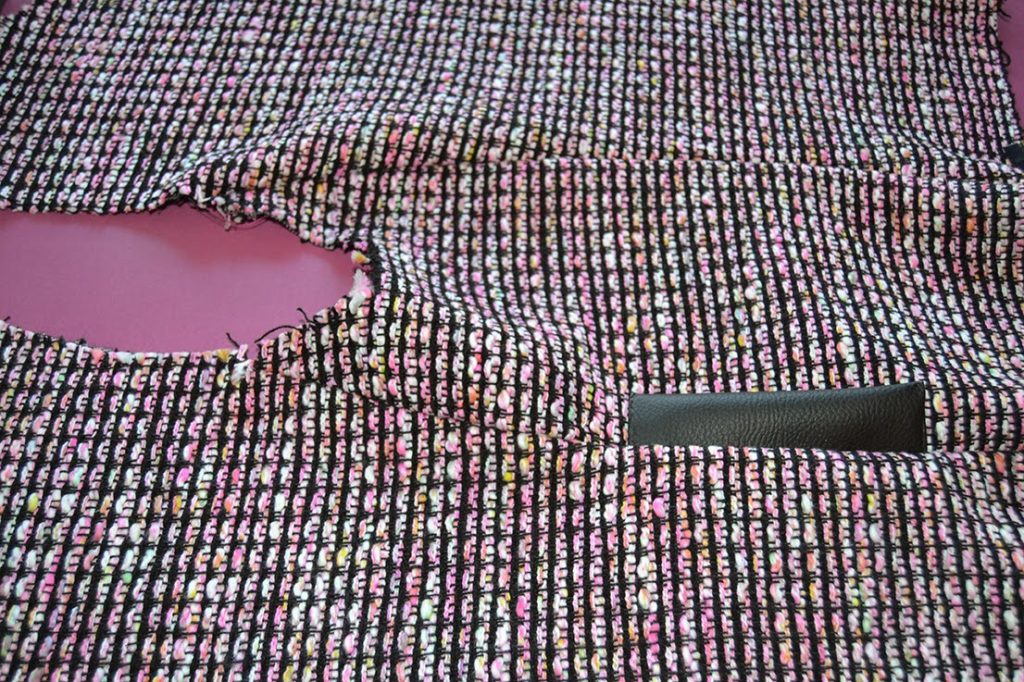
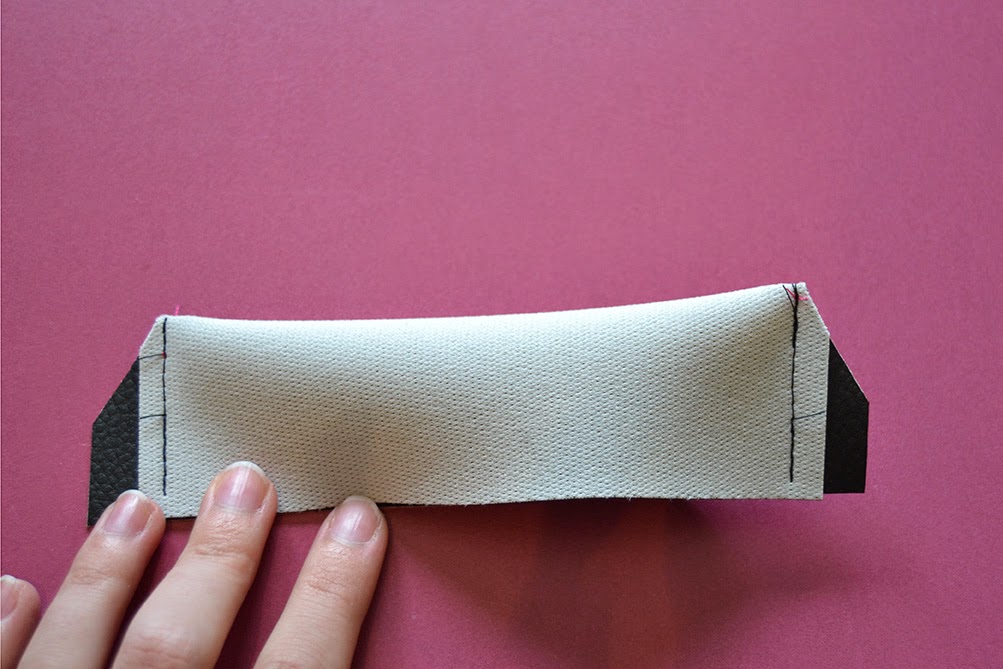
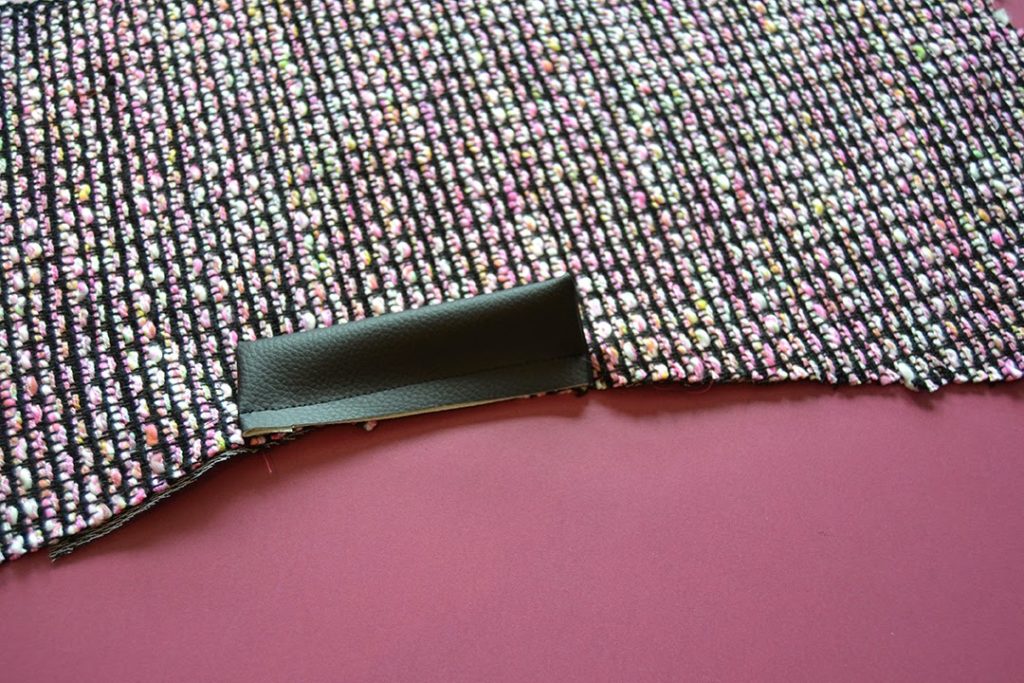
quart-coat-pattern-variation-transform-into-zipped-biker-jacket-4quart-coat-pattern-variation-transform-into-zipped-biker-jacket-5To add a leather welt to the pockets, cut 2 pieces of leather of 10 x 16 cm (4″ x 6 1/4″) and fold them vertically. Stitch the extremities together and turn inside out. Place the welt between the pocket marks on the front piece and stitch at 1 cm (3/8″) from the edge. Redraw a new pocket (see the illustration above) and place hem over the welt and the pocket marks on the side piece. Stitch the pockets according to the instructions. Stitch the welt side to the side piece.
 

quart-coat-pattern-variation-transform-into-zipped-biker-jacket-6quart-coat-pattern-variation-transform-into-zipped-biker-jacket-7quart-coat-pattern-variation-transform-into-zipped-biker-jacket-8quart-coat-pattern-variation-transform-into-zipped-biker-jacket-9
I’ll show you the finished jacket very soon (I’ll take advantage of a trip to Paris for a fair to take the pictures). By the way, printed patterns orders made between February 14th and 19th will be shipped on Friday 20th, thanks for your understanding.

signature1_editado-1


20 comments
3 FacebookTwitterPinterestEmail
Here it is, the Quart coat tutorial!

quart-coat-tutorial-sewing-pattern-1

Clic here to download the PDF of the tutorial. Clic here to download the wind flaps variation.

Download the PDF files on your computer and print the flaps variation at full scale. Access web tutorial from the tutorial PDF, clicking on the coloured link.

quart-coat-tutorial-sewing-pattern-2quart-coat-tutorial-sewing-pattern-3If you have any question, leave them in the comment section below.Thank you!

signature1_editado-1
43 comments
1 FacebookTwitterPinterestEmail

You’ve been quite a lot to ask me if it was possible to turn the Turia dungarees into a pinafore dress. And my answer is YES! And more importantly, it’s very easy to do!

Turia-dungarees-pinafore-dress-variation-1

Adeline and Sonia have already made this variation and they have tempted me so much. I think it would look so cute with a sweater and tights during the fall/winter. How about corduroy, velvet or brut denim?

TURIA PINAFORE DRESS VARIATION

Turia-dungarees-pinafore-dress-variation-2

1. Take the shorts front (10) and back (11) pieces.

2. You need to decide if you’re going to place the front piece on the fold or if you want to keep the center flat-fell seam. For the centered seam, trace a horizontal line (the blue one) starting from the top of the center front seam and parallel to the granline.

If you prefer to eliminate the center seam, trace a foldline (in red) starting 1,5 cm away from the center front seam and parallel to the grainline. You’ll place the new piece on the fold of the fabric.

3. For the back piece, you need the center seam. Trace a new seam line (in blue) from the top of the center back seam parallel to the grainline.

4. You might want to add some length as well to the hem as the shorts are… well, shorts! I would recommend adding at least 10-15 cm (4″ to 6″) for a mini to mid-thighs length dress. Just follow the side seams and add the desired length.

5. Stitch the seams the exact same way! See, that’s a very easy variation!

signature1_editado-1

9 comments
0 FacebookTwitterPinterestEmail