11.5K


 1.Depending of the version you are making, you will want to interface the wrong side of the whole front piece of the pattern (Version A, lined) or only cut small rectangles of interfacing and apply them over the buttonhole markings on the wrong side of the front piece (version B, unlined).

 2.On the pattern, you will notice that you just have a line, not a box, to mark the buttonhole place. This is because the box dimension is going to depend of your button. Here is how to measure the box you will need to draw:

 3.Cut a patch of fabric about 10 cm x 10 cm (3.9″ x 3.9″) on the fabric bias. We will trim the edges at the end so don’t worry too much about the size.


 5.Now you have to be very careful with this step! Cut through both layers (the front and the patch) from the center and cut in V into the angles of the box. You have to cut the closest possible to the stitches without cutting them (if you have small embroidery scissors, it’s a perfect time to use them).

 6.Pass the patch through the open box. Lay it flat and press lightly. If the corners don’t lay flat, it’s because you haven’t cut close enough to the stitches during the previous step (fold it back carefully and cut a little bit closer).


 8.Fold the bottom of the patch in two to form the second “lip”. Both lips meet in the middle. Pin in place. You can press lightly so it keeps its shape, but be careful that the edges don’t show.
 9.Here is how it looks from the right side!


 10.You might notice that there are small triangles at the ends of the box. Like on the second picture, stitch the small triangle to the patch, securing the folds. Use a short stitch length and stitch the closest possible to the fold of the triangle.
 11.Remove the basting threads and make the other buttonholes!

HAPPY NEW YEAR!
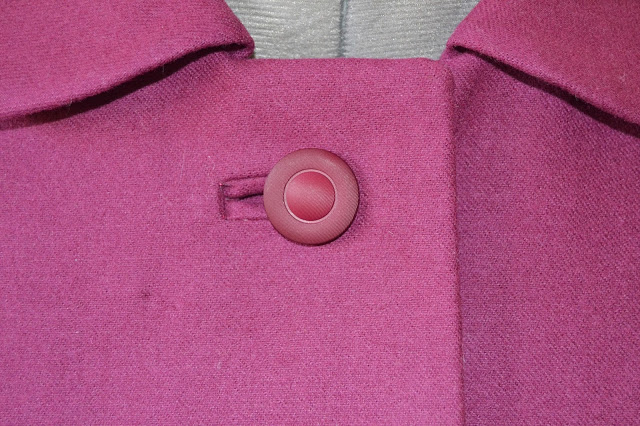
I hope you had an amazing New Year Eve and Day! I couldn’t find a better way to start 2014 than with a sewing tutorial: the perfect way to put into practice all those sewing resolutions I’m sure you took…
I am not planning to make a full-on Sew-along for the Ninot Jacket but rather a series of tutorials about the most difficult steps such as the bound buttonholes, the welt pockets, the collar… The construction of the rest of the jacket is easy but if you feel like you would like to see one step in details, let me know. So let’s start today with the bound buttonholes!
PATCH TECHNIQUE
The patch technique is basically a patch of fabric folded to form the little “lips” of the bound buttonhole. You might want to practice on a piece of fabric before starting on your real jacket 🙂
INTERFACING
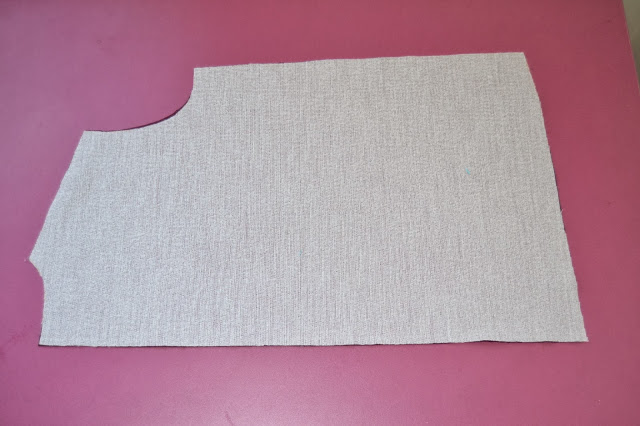
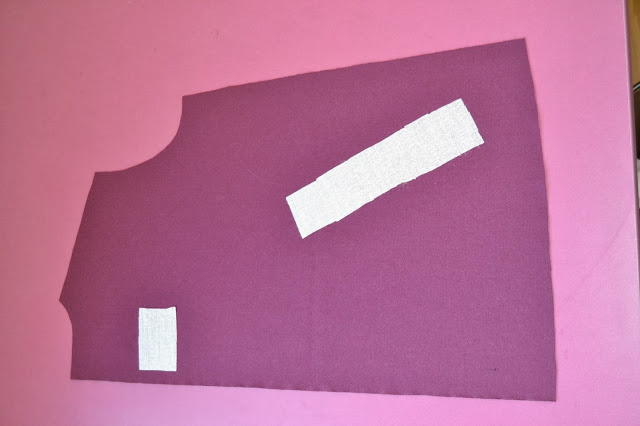 1.Depending of the version you are making, you will want to interface the wrong side of the whole front piece of the pattern (Version A, lined) or only cut small rectangles of interfacing and apply them over the buttonhole markings on the wrong side of the front piece (version B, unlined).
DRAW THE BOX
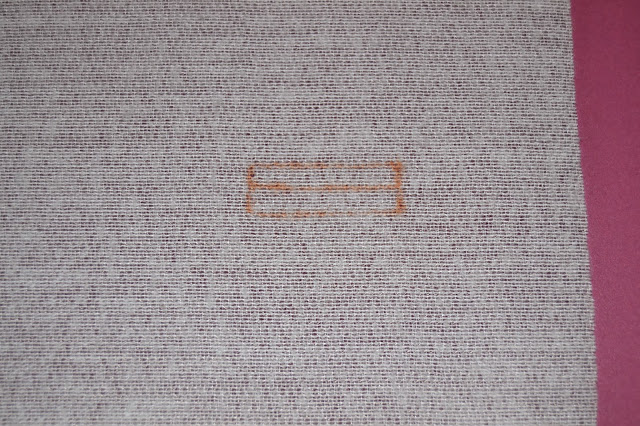
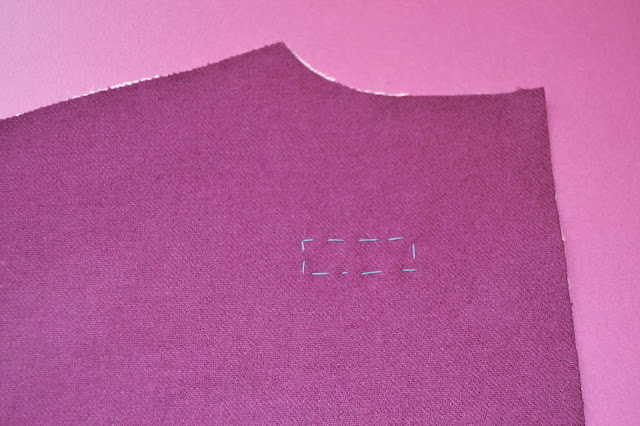 2.On the pattern, you will notice that you just have a line, not a box, to mark the buttonhole place. This is because the box dimension is going to depend of your button. Here is how to measure the box you will need to draw:
Take your button length and add 1 cm (3/8″) to it to obtain the box length. The box width is 1 cm as well (3/8″) which you divide by a centered line. For example, you have a 4 cm button, your box is going to be 5 cm x 1 cm (2″ x 3/8″) with a centered horizontal line at 0.5 cm (3/16″).
Report the box on the interfacing and baste around it.
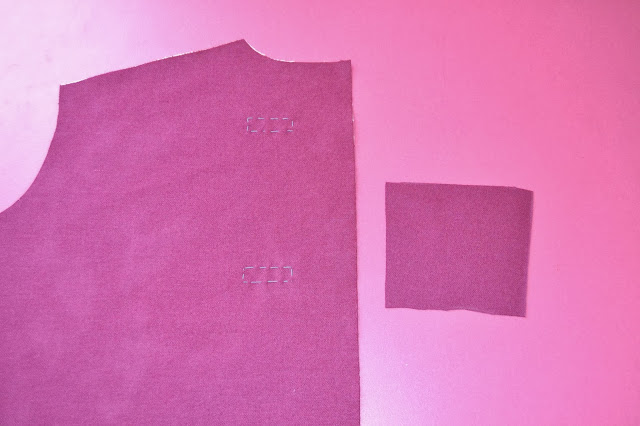
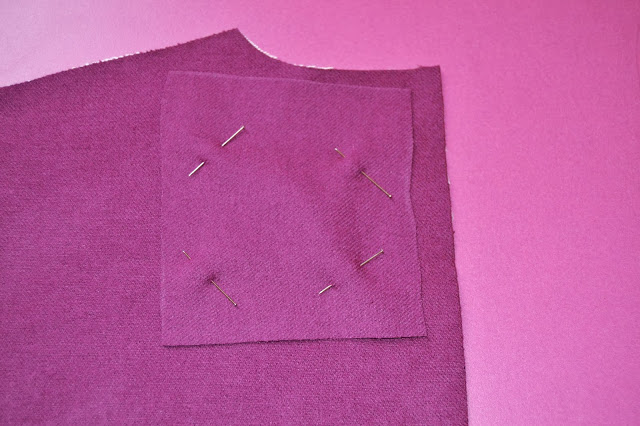 3.Cut a patch of fabric about 10 cm x 10 cm (3.9″ x 3.9″) on the fabric bias. We will trim the edges at the end so don’t worry too much about the size.
With right sides together, pin the patch over the basted box.
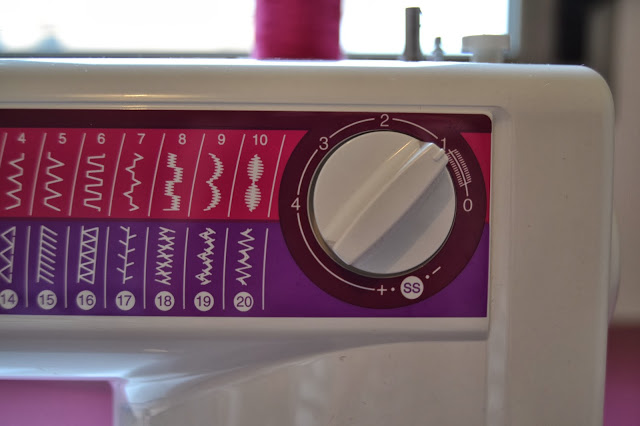
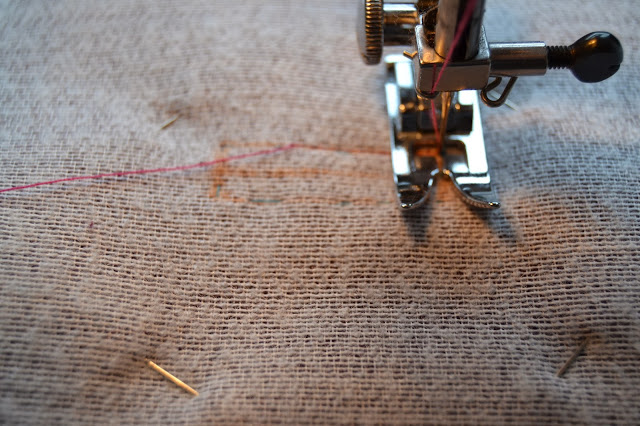
4.Select a short stitch length on your machine.
From the wrong side, stitch around the box starting from a long side. You might want to count the stitches you make on the short sides to be sure they are the same length.
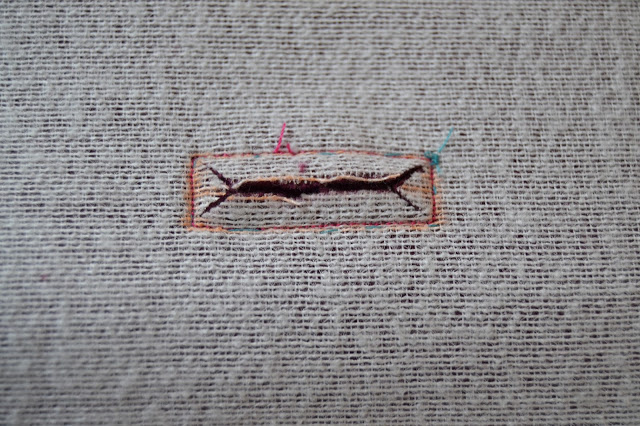 5.Now you have to be very careful with this step! Cut through both layers (the front and the patch) from the center and cut in V into the angles of the box. You have to cut the closest possible to the stitches without cutting them (if you have small embroidery scissors, it’s a perfect time to use them).
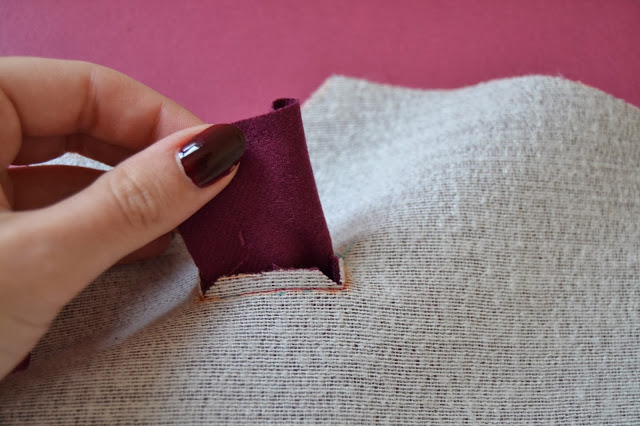
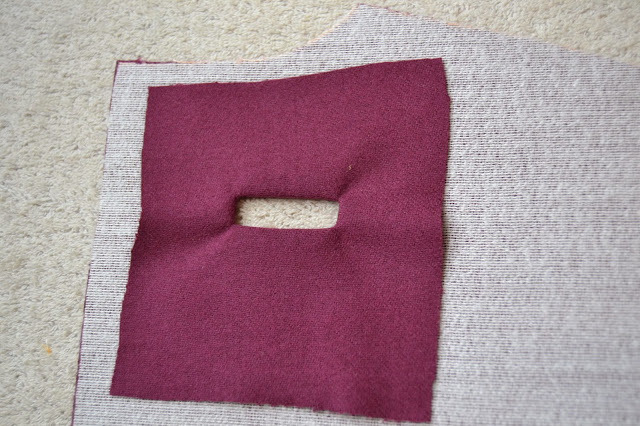 6.Pass the patch through the open box. Lay it flat and press lightly. If the corners don’t lay flat, it’s because you haven’t cut close enough to the stitches during the previous step (fold it back carefully and cut a little bit closer).
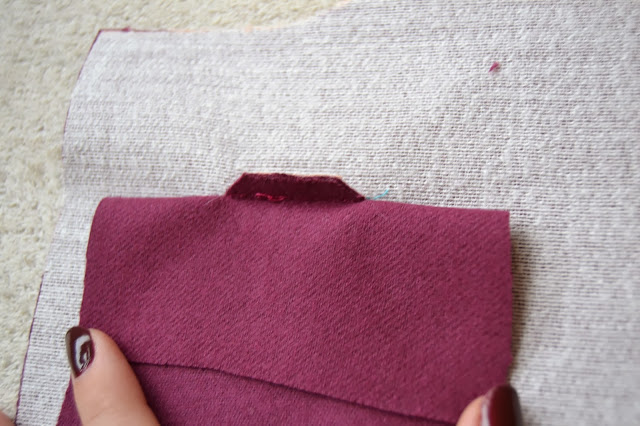
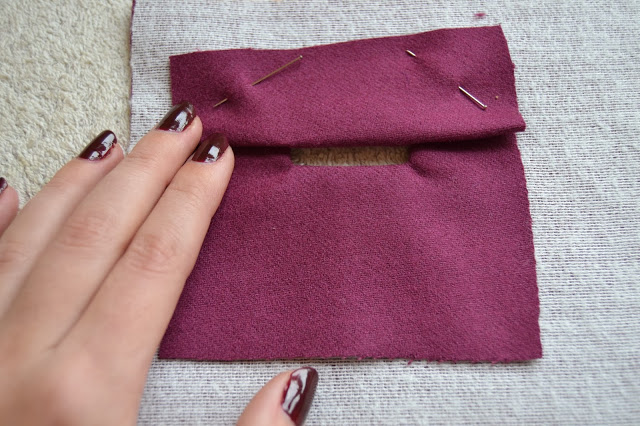
7.Fold the top of the patch in two so that it forms the first “lip” of the buttonhole. The fold should reach the center of the box. Pin in place.
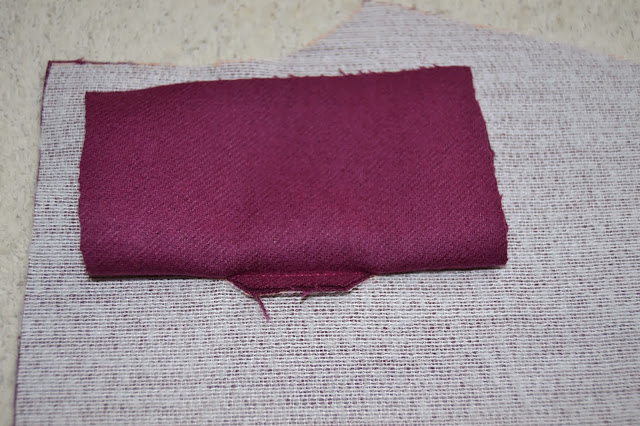
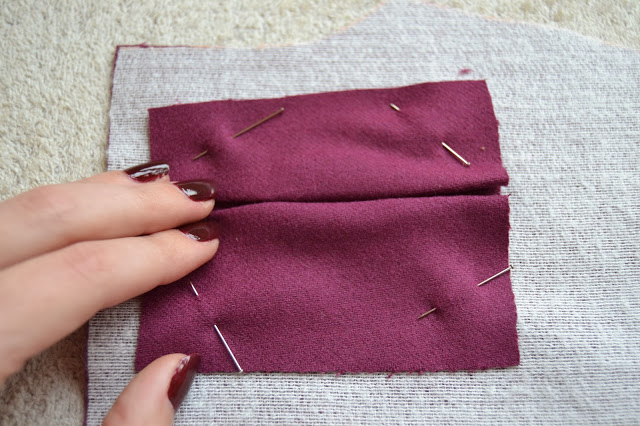 8.Fold the bottom of the patch in two to form the second “lip”. Both lips meet in the middle. Pin in place. You can press lightly so it keeps its shape, but be careful that the edges don’t show.
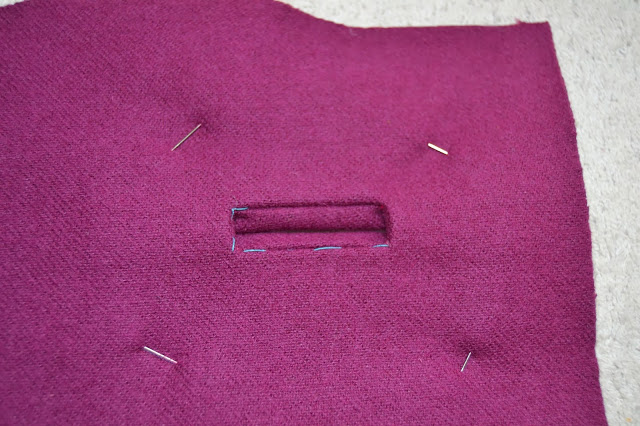 9.Here is how it looks from the right side!
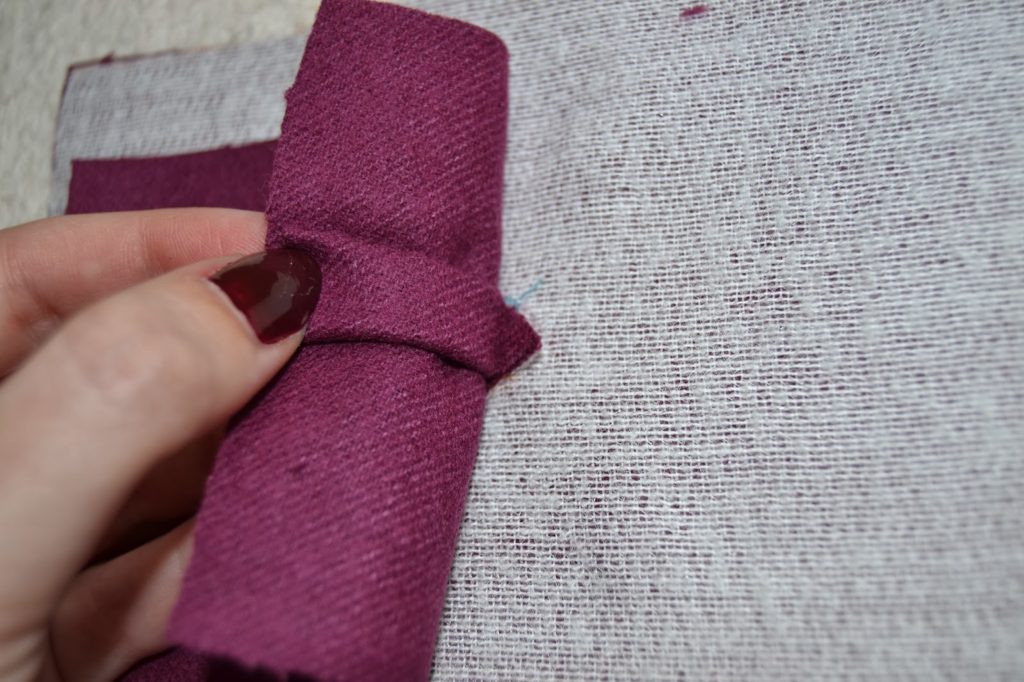
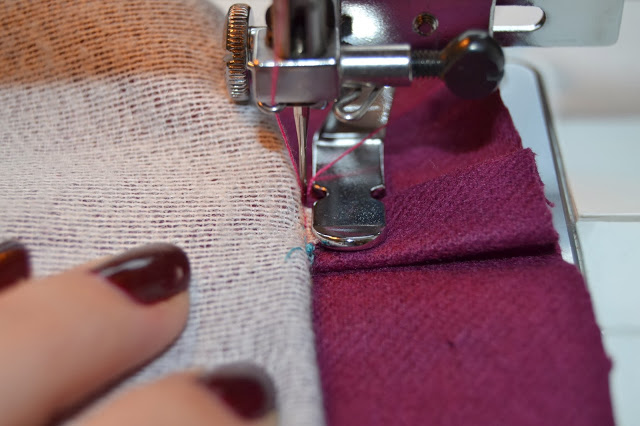
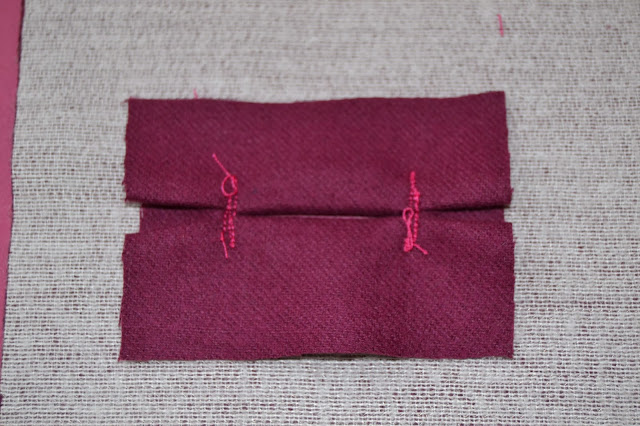 10.You might notice that there are small triangles at the ends of the box. Like on the second picture, stitch the small triangle to the patch, securing the folds. Use a short stitch length and stitch the closest possible to the fold of the triangle.
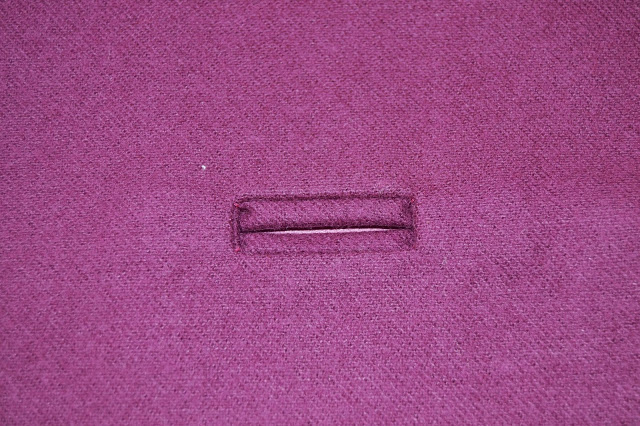 11.Remove the basting threads and make the other buttonholes!
On Monday, we’ll see how to stitch the buttonholes openings on the facing to make a beautiful finish on the inside as well.
Have a great week end and ¡Felices Reyes! (Wise Men Day, January 6th: in Spain, they bring the presents to the children).

31 comments
PERFECTO!!!
Yo el parche lo corté al bies y lo aplané mucho con la plancha porque mi tela era gordita pero por lo demás lo hice como tú y en las instrucciones está perfecto!
¡Gracias Merche! Existe otras técnicas: una en particular me viene en mente para las telas más gorditas. Es muy parecido a la manera de construir el bolsillo:http://sewaholic.net/bound-buttonholes-my-favourite-method/. Está bien para telas que no marcan bien el pliegue con la plancha como las lanas gordas.
A buttonhole can be beautiful!
I still have never made a bound buttonhole. I have your Ninot pattern and would love to make it but I have to find a way to print it. At least I don't have to trace it! I am lazy (you know that! )
Well, this is a great tutorial that I will turn to when the time comes, so thank you!
Bound buttonholes are really pretty and add a tailored touch to any garment, but I know they can be scary. Why not try on some fabric leftover while waiting for printing the pattern? And you can still make normal machine-made buttonholes on the Ninot jacket if you don't feel confident enough 😉
Wow! Its Perfect!
Thanks!
Thanks NAT!
Thanks for this post! I've been thinking over your 2013 round up for days and wanted to ask this question – the dress and jacket combo in the picture that is on the 2nd row up from the bottom and 2nd picture in from the right. Is this the Malvarosa dress and the Ninot jacket? If so, I'm putting it on my sewing list for this year. I love it!
Hi Maddie! Yes, the dress is the Malvarosa pattern! But the coat is from Burda, changed heavily so that it doesn't look like the original at all. But the Malvarosa paired with a longer version of the Ninot jacket would look amazing. I'm actually waiting for the sales to start to hit the fabric store and buy enough fabric for this combination 😉
Muchas gracias, muy bien explicado y muy claro.
Gracias!
Félicitations pour le tuto! Les étapes et les photos sont très clairement expliquées!
Merci Anna!
Que tutorial mas bueno! Muchas gracias! Te quedó perfecto! Un beso
Gracias Julita! Espero que puede ayudar a algunas 😉
gracias pauline!! porque voy por el cuello y leo y leo y no me aclaro, te iba a escribir un mail, pero si vas a hacer un tutorial genial!!! Los ojales y el bolsillo se me ha dado bastante bien!!
Me alegro que los ojales y bosillos te quedan bien! El cuello viene durante la semana próxima. Si quieres mandarme un mail, no dudas!
Merci pour ce tuto très clair, j'ai hâte de commencer mon ouvrage. en attendant je te souhaite une très bonne année 2014, j'espère que tous tes projets se réaliseront.
Merci Armide! Très bonne année à toi aussi, pleine de couture et de projets…
Very clever! Thanks for sharing!
Thanks Nat! Can't wait to see your Malvarosa!
Thanks for this tutorial – very informative.
Thank you.
muchísimas gracias por el tutorial, me vendrá genial, seguro!
Espero que te sirve guapa!
So glad that you added this tutorial! I'm working on my Ninot Jacket and am at the point where I need to make a decision about the type of buttonhole I will make. It would be SOOOOOO much easier just to make a plain machine buttonhole; however, one part of me thinks a plain one wouldn't do the Ninot justice. Mmmmm, I'll make my final decision when you show the facing part of doing the bound buttonhole.
I remember my first coat and THE decision: should I make bound buttonholes or not? Don't worry, if you don't try it now, maybe on the next jacket you're making you'll feel more confident. Anyway, make some samples on fabric left over to practice a little before 😉
Feliz año nuevo Pauline!!!!!!!!!!!!!!!!! Que el 2014 te traiga un montón de cosas buenas! Un besazo!
¡Muchas gracias Maider! Igualmente!
Genial, esta perfecto.
Thank you for commenting on my blog Pauline! I'm so glad I got your pattern. Last night I practiced your bound buttonhole method on some cotton scrap fabric – much easier than ones I made before, tonight I'll practice a bit on scraps of the actual wool blend fabric. I'll be posting my results all along the way. Thanks so much for the tutorials too. An added bonus!
Merci ! ça semble beaucoup plus simple que ce que je pensais. Par contre j ai encore une question : comment doit-on s'y prendre avec la doublure?
Je vous ai croisée au salon csf, vous êtes radieuse! et j adore le côté rétro de vos patrons. Bravo!
Comments are closed.